
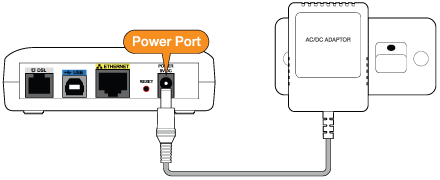
1. Plug the modem POWER/9V DC power socket into the building's power socket.
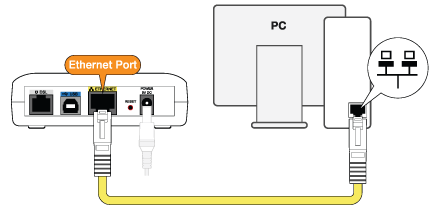
2. Plug the modem ETHERNET socket into the computer ETHERNET or LAN socket.
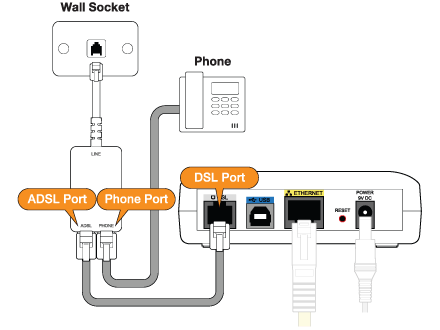
3. If you have a phone handset or fax machine on the same phone line as your ADSL, you need a double adapter and an ADSL line filter:
a. Plug the modem DSL socket into the double adapter.
b. Plug the phone's (or fax machine's) line socket into the PHONE end of the filter.
c. Plug the filter ADSL socket into the double adapter.
d. Plug the double adapter into the building's phone line socket.
4. Click the Start button.
5. Click Control Panel.

6. Click Network and Internet.

7. Click Network and Sharing Center.

8. Click Manage network connections.

9. Click Local Area Connection.
10. Click Change settings of this connection.

11. Click Internet Protocol Version 4 (TCP/IPv4).
12. Click Properties.
 then click Properties.")
13. Click Obtain an IP address automatically.
14. Click Obtain DNS server address automatically.
15. Click Alternate Configuration.

16. Click Automatic private IP address.
17. Click OK.

18. Click Close.

19. Click Start.
20. Click Internet.

21. Type 192.168.1.254 into the Address box.
22. Click Go.

23. Type root into the User Name box.
24. Type the password provided with your modem into the Password box.
25. Click Log In.

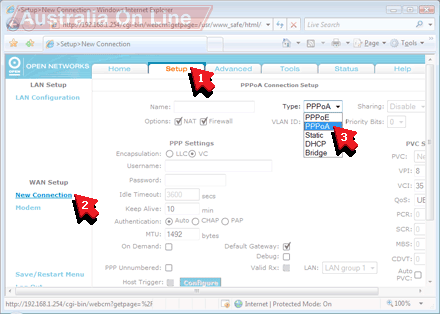
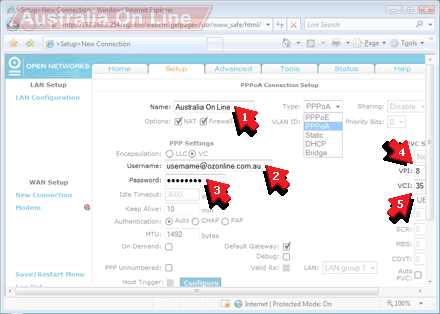
26. Click Setup [1].
27. Click New Connection [2].
28. Click PPPoA in the Type box [3].
29. Type Australia On Line into the Name box [1].
30. Type your Australia On Line ADSL username into the Username box [2].
31. Type your Australia On Line ADSL password into the Password box [3].
32. Type 8 into the VPI box [4].
33. Type 35 into the VCI box [5].
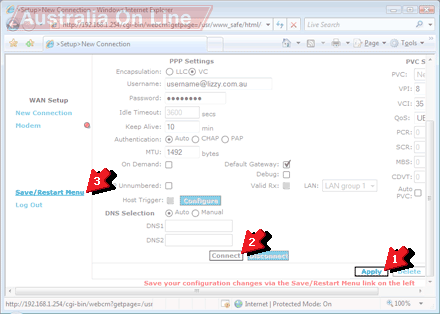
34. Scroll down until you can see the Apply button.
35. Click Apply.
36. Click Connect.
37. Click Save/Restart Menu.
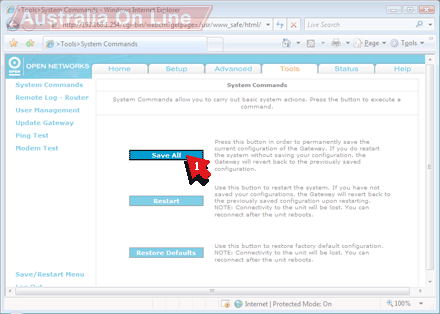
38. Click Save All.
39. Click OK.
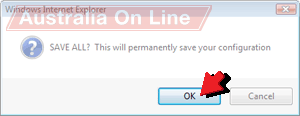
40. You are now connected to the internet!


©2024 Australia On Line
Terms & conditions - SFOA
Go back to the Australia On Line front page.

